> For the complete documentation index, see [llms.txt](https://blog.securescape.cc/llms.txt). Markdown versions of documentation pages are available by appending `.md` to page URLs; this page is available as [Markdown](https://blog.securescape.cc/drafts/ds/security-operations/intrusion-detection-and-prevention/suricata/intro-to-suricata.md).

# Intro to Suricata

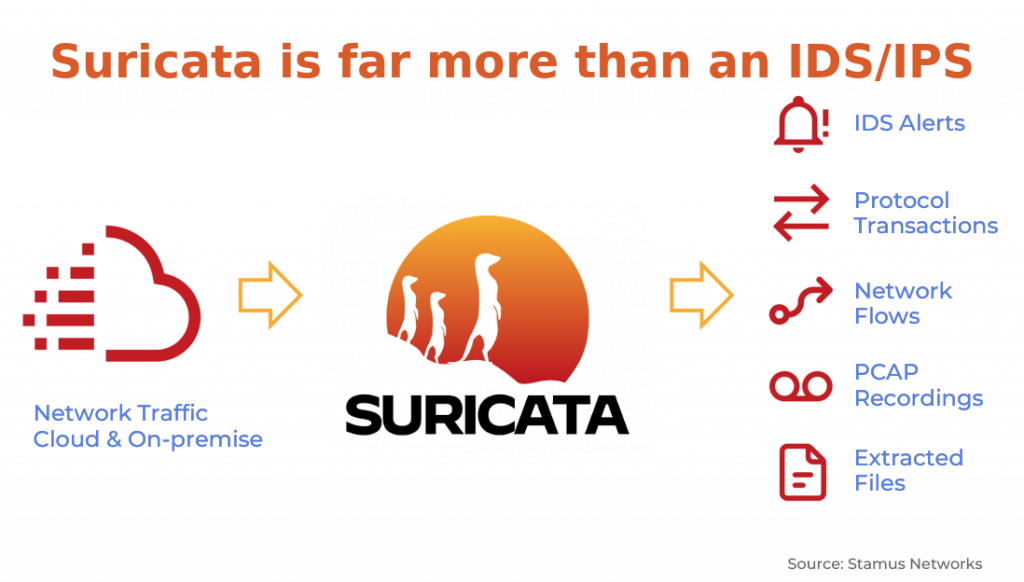
> Suricata is a high performance, open source network analysis and threat detection software used by most private and public organizations, and embedded by major vendors to protect their assets.

<figure><img src="/files/lCZJ620ywc1ssrGIzU3e" alt=""><figcaption><p>Image from the website</p></figcaption></figure>

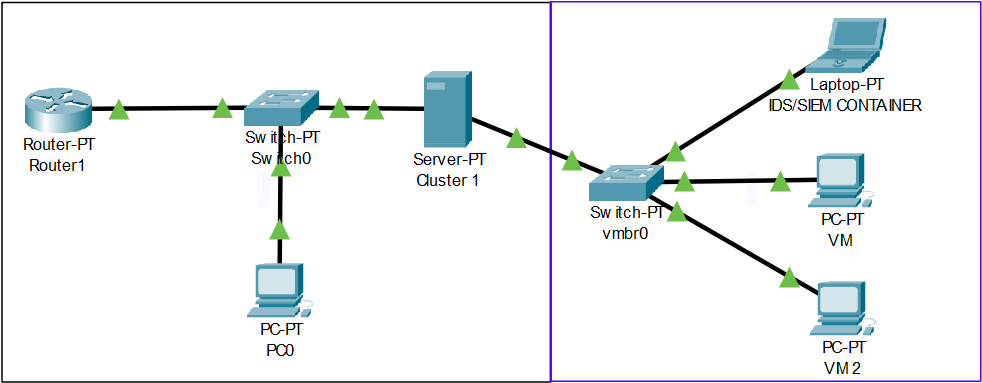
## Topology

I'll be using a Debian 11 container running on Proxmox for this.&#x20;

<figure><img src="/files/sLc1CvWWY6MUS1t11XNS" alt=""><figcaption></figcaption></figure>

## Installation

Download the latest version of Suricata from [this link](https://suricata.io/download/).&#x20;

### Installation Script

<pre class="language-bash"><code class="lang-bash">#!/bin/bash

# Debian Install
sudo apt update -y &#x26;&#x26; sudo apt upgrade -y
sudo apt-get install build-essential libpcap-dev   \
                libnet1-dev libyaml-0-2 libyaml-dev pkg-config zlib1g zlib1g-dev \
                libcap-ng-dev libcap-ng0 make libmagic-dev         \
                libgeoip-dev liblua5.1-dev libhiredis-dev libevent-dev \
                python-yaml rustc cargo libpcre2-dev -y

# Install Suricata

echo "[*] Installing Suricata"
sudo apt-get install suricata -y
echo "[+] Installed, check status"
sudo suricata --build-info
sudo systemctl status suricata

# Install PulledPork
cd /opt/
<strong>sudo git clone https://github.com/shirkdog/pulledpork
</strong>cd pulledpork

sudo mkdir /usr/local/etc/pulledpork/
sudo cp etc/pulledpork.conf /usr/local/etc/pulledpork/

sudo mkdir /usr/local/bin/pulledpork/
sudo cp pulledpork.py /usr/local/bin/pulledpork/
sudo cp -r lib/ /usr/local/bin/pulledpork/
echo "[+] Adding pulledpork to bashrc/zshrc"
echo "alias pulledpork='python3 /opt/pulledpork/pulledpork.pl'" >> /home/.bashrc
echo "alias pulledpork='python3 /opt/pulledpork/pulledpork.pl'" >> /home/.zshrc
echo "alias pulledpork='python3 /opt/pulledpork/pulledpork.pl'" >> /home/$USER/.bashrc
echo "alias pulledpork='python3 /opt/pulledpork/pulledpork.pl'" >> /home/$USER/.zshrc

echo "[!] Reboot system"
</code></pre>

### Troubleshooting

{% embed url="<https://forum.suricata.io/t/failed-suricata-service-suricata-ids-idp-daemon/2349/6>" %}

Don't worry if you run into this error, you will fix it in [#signatures](#signatures "mention")

## Setting Up

### Config

Now that we have Suricata installed, let's give it an interface to listen on. Run `ifconfig` or `ip a` to find your IP and subnet, then edit your `suricata.yaml` file to include it.

<pre class="language-bash"><code class="lang-bash">eth0@if44: inet 192.168.100.173/24 brd 192.168.100.255 scope global dynamic eth0
<strong>sudo vim /etc/suricata/suricata.yaml
</strong>
# Suricata configuration file. In addition to the comments describing all
# options in this file, full documentation can be found at:
# https://suricata.readthedocs.io/en/latest/configuration/suricata-yaml.html

##
## Step 1: Inform Suricata about your network
##

vars:
  # more specific is better for alert accuracy and performance
  address-groups:
    HOME_NET: "[192.168.100.0/24]" # My subnet and mask
    #HOME_NET: "[192.168.0.0/16,10.0.0.0/8,172.16.0.0/12]"
    #HOME_NET: "[192.168.0.0/16]"
    #HOME_NET: "[10.0.0.0/8]"
    #HOME_NET: "[172.16.0.0/12]"
    #HOME_NET: "any"
    
# Scroll down to Port Groups
&#x3C;..>
  port-groups:
    HTTP_PORTS: "80,8000" # Add 8000 for Splunk
    SHELLCODE_PORTS: "!80"
    ORACLE_PORTS: 1521
    SSH_PORTS: 22
    DNP3_PORTS: 20000
    MODBUS_PORTS: 502
    FILE_DATA_PORTS: "[$HTTP_PORTS,110,143]"
    FTP_PORTS: 21
    GENEVE_PORTS: 6081
    VXLAN_PORTS: 4789
    TEREDO_PORTS: 3544
&#x3C;..>

# Find af-packet
## Step 3: Configure common capture settings
##
## See "Advanced Capture Options" below for more options, including Netmap
## and PF_RING.
##

# Linux high speed capture support
af-packet:
  - interface: eth0 # Change this to your interface
    cluster-type: cluster_flow
    defrag: yes
    use-mmap: yes
    tpacket-v3: yes
# Leave everything else as default

</code></pre>

### Signatures

> Suricata uses Signatures to trigger alerts so it’s necessary to install those and keep them updated. Signatures are also called rules, thus the name *rule-files*. With the tool `suricata-update` rules can be fetched, updated and managed to be provided for Suricata.
>
> In this guide we just run the default mode which fetches the ET Open ruleset:

```bash
suricata-update
```

Afterwards the rules are installed at `/var/lib/suricata/rules` which is also the default at the config and uses the sole `suricata.rules` file.

### Running Suricata

```bash
# With the rules installed, Suricata can run properly and thus we restart it:

sudo systemctl restart suricata

# To make sure Suricata is running check the Suricata log:

sudo tail /var/log/suricata/suricata.log

# The last line will be similar to this:

<Notice> - all 4 packet processing threads, 4 management threads initialized, engine started.

# The actual thread count will depend on the system and the configuration.
# Linux high speed capture support
#af-packet:
#  - interface: eth0@if44
    # Number of receive threads. "auto" uses the number of cores
    #threads: auto <-- change this in suricata.yaml
# To see statistics, check the stats.log file:

sudo tail -f /var/log/suricata/stats.log

# By default, it is updated every 8 seconds to show updated values with the current state, like how many packets have been processed and what type of traffic was decoded.
```

### Optional - Web Interface

{% embed url="<https://idstower.com/>" %}

<figure><img src="/files/Na6lnwtjWLKCoMhT2TTh" alt=""><figcaption></figcaption></figure>

Click on the free option then sign up

<figure><img src="/files/wesqlqRnS7n2XnhbQdZS" alt=""><figcaption></figcaption></figure>

Activate your account then follow this guide to install it

{% embed url="<https://www.idstower.com/docs/quick_install.html>" %}

## Rules & Rule Management

{% embed url="<https://suricata.readthedocs.io/en/latest/rules/index.html>" %}

{% embed url="<https://suricata.readthedocs.io/en/latest/rule-management/index.html>" %}

### Rules Upkeep with PulledPork

The good thing with Suricata is it can utilise Snort rules, this lets us use the Snort tool - Pulled Pork to have access to a larger ruleset, as well as having the advantage of transitioning from Snort to Suricata easily.\
\
The script downloaded pulledpork in your `/opt/pulledpork3` directory. We will use the default ruleset from ET OPEN Rule-set

{% embed url="<https://rules.emergingthreats.net/OPEN_download_instructions.html>" %}

```bash
# Edit your pulledpork config file
vim /opt/pulledpork3/etc/pulledpork.conf
# and add this line
rule_url=https://rules.emergingthreats.net/|emerging.rules.tar.gz|open

# It should look like this

# Which Snort/Talos rulesets do you want to download (recomended: choose only one)
community_ruleset = false
registered_ruleset = false
LightSPD_ruleset = false

# Your Snort oinkcode is required for snort/talos Subscription, Light_SPD, and Registered rulesets
oinkcode = xxxxx

# which blocklists to download
snort_blocklist = false
et_blocklist = false

# additional blocklists to download from a URL, comma-separated
#blocklist_urls = http://a.b.com/list.list

# Where to write the blocklist file (single file containing all blocklists downloaded)
blocklist_path = /usr/local/etc/lists/default.blocklist

# Custom Rules
rule_url=https://rules.emergingthreats.net/|emerging.rules.tar.gz|open

<..>

# Now, run this to pull the ruleset and have it autoupdate
/opt/pulledpork/pulledpork.pl -S suricata-6.0.1 -c /opt/pulledpork/etc/pulledpork.conf
```

### Managing Rules with `suricata-update`